In this article36 sections
- 01.Choose the Right SIM Setup Before You Power On
- ↳Physical SIM vs eSIM: What You Need to Know
- 02.How to Set Up a New Smartphone: First Boot and Account Login
- ↳Connect to a Trusted Wi-Fi Network First
- ↳Sign In to Your Google or Apple Account
- 03.Transfer Your Data Without Losing Anything
- ↳Android to Android: Use Google’s Transfer Tool
- ↳iPhone to iPhone: Use iCloud or a Direct Cable Transfer
- ↳Switching Between Platforms
- 04.Secure Your Phone With Strong Authentication
- ↳Set Up Biometric Authentication
- ↳Enable Find My Device
- 05.Lock Down Your Privacy Settings and App Permissions
- ↳Review App Permissions Immediately
- ↳Disable Your Advertising ID
- ↳Control Notifications From the Start
- 06.Optimise Your Display and Battery Settings
- ↳Enable Adaptive Brightness
- ↳Turn On Dark Mode
- ↳Set Up Battery Saver Mode
- 07.Install and Organise Your Apps the Right Way
- ↳Only Install What You Actually Need
- ↳Organise Your Home Screen for Productivity
- ↳Update All Apps Immediately After Installing
- 08.Back Up Your New Phone Before You Do Anything Else
- ↳Enable Cloud Backup on iPhone and Android
- ↳Consider a Secondary Photo Backup
- 09.Explore the AI Features Built Into Your Device
- 10.Frequently Asked Questions
- ↳How long does a full new smartphone setup take?
- ↳Do I need to charge my new phone to 100% before using it for the first time?
- ↳What is the safest way to transfer data from an old phone to a new one?
- ↳Should I set up an eSIM or use a physical SIM card?
- ↳How do I know which app permissions to allow?
- ↳How often should I back up my new phone?
- 11.Get Your New Smartphone Setup Right the First Time
How to Set Up a New Smartphone Like a Pro: The Complete 2026 Guide
Setting up a new smartphone the right way takes less than an hour, but most people skip the steps that matter most. They power it on, restore an old backup, and wonder later why their battery drains fast, their apps feel sluggish, or their accounts get compromised. The first setup session determines how secure, fast, and organised your phone will be for the next two or three years. Getting it right from the start is worth your full attention.
The smartphone landscape has changed significantly. As of 2026, most flagship and midrange devices ship with OLED displays, eSIM support, and AI features built directly into the operating system. Those changes affect the choices you make during setup. Understanding them saves time and prevents mistakes that are annoying to fix later.
This guide walks you through every critical step: from inserting your SIM to locking down your privacy settings, managing permissions, transferring data, and optimising your display and battery. Whether you just picked up a new iPhone or an Android device, these steps apply to both platforms and take the guesswork out of the process.
Choose the Right SIM Setup Before You Power On
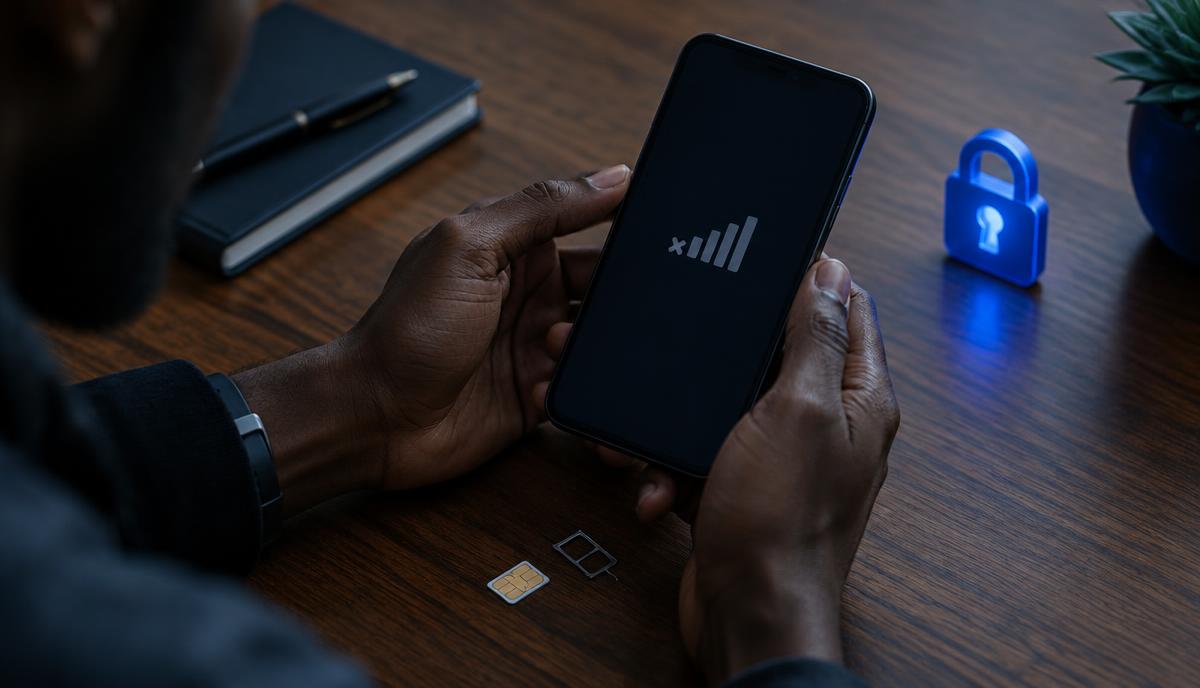
The very first decision happens before you even turn the phone on. You need to decide whether to use a physical SIM card, an eSIM (embedded SIM), or both. This choice affects how you connect to your carrier and how easily you can switch plans later.
Physical SIM vs eSIM: What You Need to Know
An eSIM is a digital SIM card built into the phone. It lets you activate a carrier plan entirely through software, without inserting a physical card. Current US models of iPhone (since the iPhone 14) and Google Pixel phones ship without a physical SIM tray at all, as confirmed by TechEngage’s 2026 smartphone setup guide. If you are on one of these devices, eSIM is your only option.
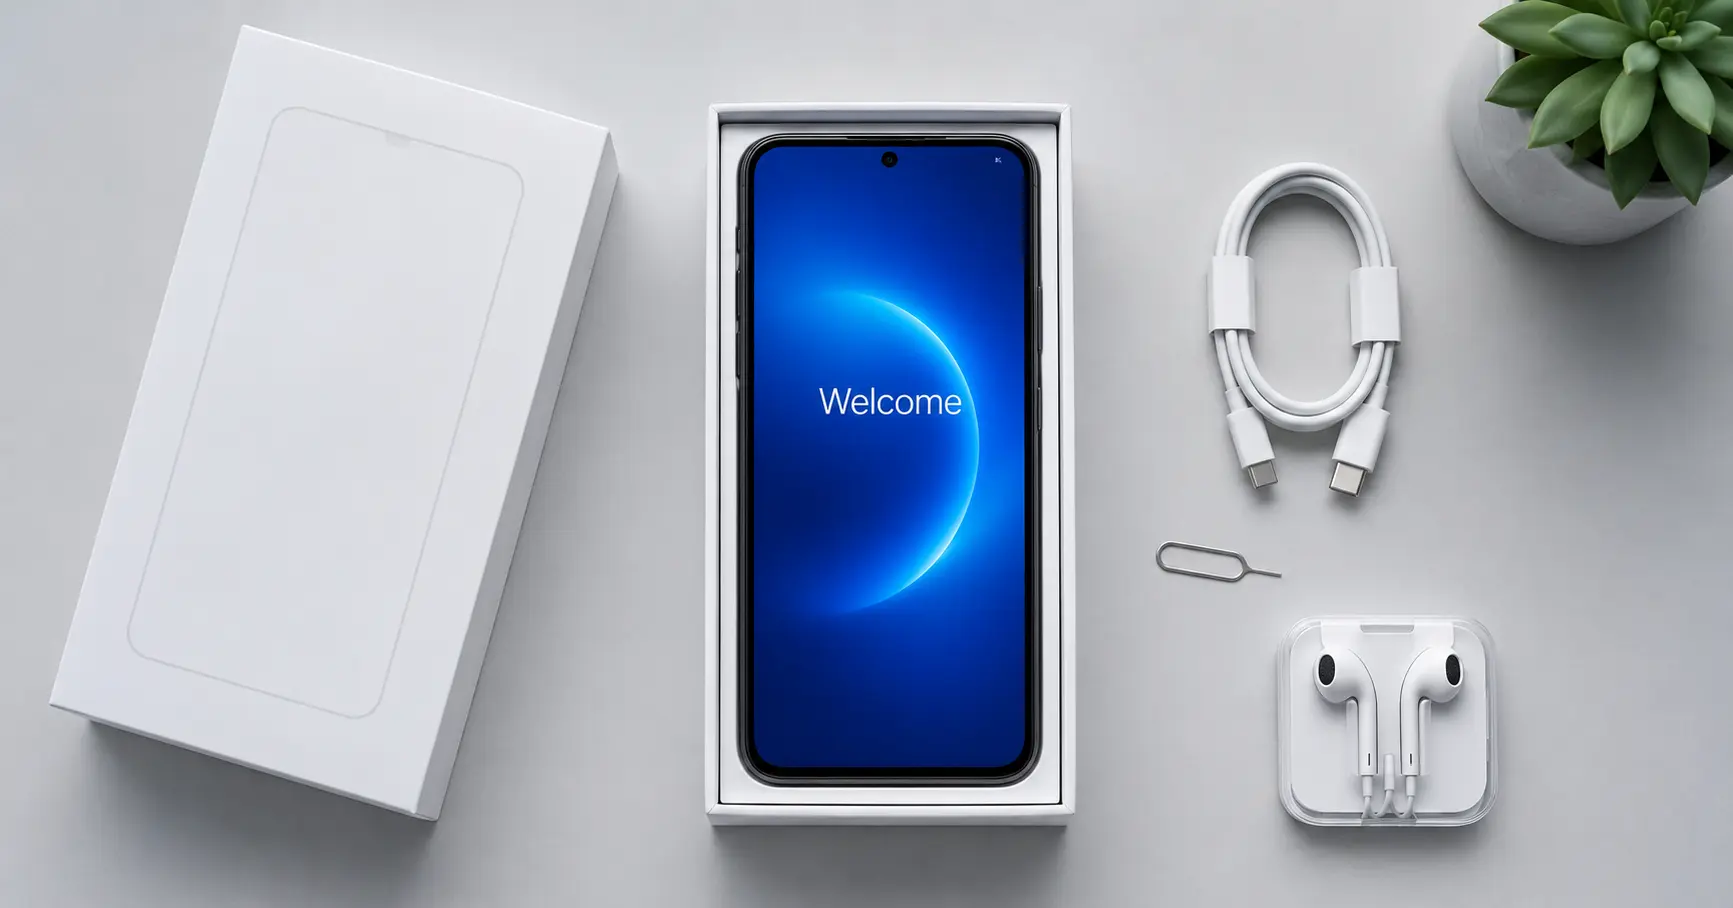
For phones that still include a SIM tray, use the ejector tool included in the box. Insert it into the small hole on the tray edge, pop the tray out, and place your SIM with the gold contacts facing down. Push the tray back in until it clicks. Then power on the phone.
If you are switching from an iPhone to an Android phone, deregister your number from iMessage before swapping devices. Skipping this step causes messages from iPhone contacts to route to your old Apple ID instead of reaching your new phone.
How to Set Up a New Smartphone: First Boot and Account Login
Now the real setup begins. The initial boot sequence on both Android and iOS guides you through language selection, Wi-Fi connection, and account login. Follow these steps carefully because the decisions here shape everything else.
Connect to a Trusted Wi-Fi Network First
Connect to your home or work Wi-Fi during setup, not a public network. Public Wi-Fi networks often lack encryption, which means your login credentials and account details can be exposed during the setup process. This is a basic but widely ignored step.
Sign In to Your Google or Apple Account
Signing in to your account during first boot activates cloud backup, the app store, and cross-device syncing all at once. Use a strong, unique password for this account. Enable two-factor authentication (2FA), which is the system that requires a second verification step beyond your password, before you do anything else. This single action dramatically reduces the risk of an account takeover.
If you use an authenticator app for 2FA codes, transfer it from your old phone during setup. Export the backup from your old authenticator app first, then import it to the new device. Forgetting this step locks you out of every account that relies on those codes.
Transfer Your Data Without Losing Anything
Data transfer is where most people run into problems. Moving from an old device to a new one of the same platform is straightforward. Switching between platforms requires more care.
Android to Android: Use Google’s Transfer Tool
Android devices use a built-in cable or wireless transfer tool during first boot. Keep your old phone nearby and charged. The tool copies contacts, photos, apps, and settings in a single process. Most transfers complete within 20 to 30 minutes depending on how much data you have.
iPhone to iPhone: Use iCloud or a Direct Cable Transfer
On iOS, the Quick Start feature lets you hold your old iPhone next to your new one. It transfers your settings, app layout, and data wirelessly using an encrypted connection. Alternatively, restore from an iCloud backup during setup. Make sure your most recent iCloud backup was taken within the past 24 hours before you begin.
Switching Between Platforms
For switching from iPhone to Android, back up your iPhone data using the Google Drive iOS app first. Then restore from that backup on your new Android phone. Contacts, photos, calendar events, and documents transfer well. Some app-specific data and iMessage history will not carry over. That is a platform limitation, not a setup error.
For switching from Android to iPhone, Apple’s Move to iOS app handles the transfer. Download it on your Android phone before you begin the iPhone setup process. The tool runs a private Wi-Fi connection between the two devices and transfers your content directly.
Secure Your Phone With Strong Authentication
Security setup is the most important part of the entire process. A phone without strong authentication is a liability. Mobile threats continue to grow, with harmful apps on smartphones increasing significantly year over year, according to Vertu’s 2025 smartphone privacy report. Setting up proper locks from the start costs you two minutes and protects everything on the device.
Set Up Biometric Authentication
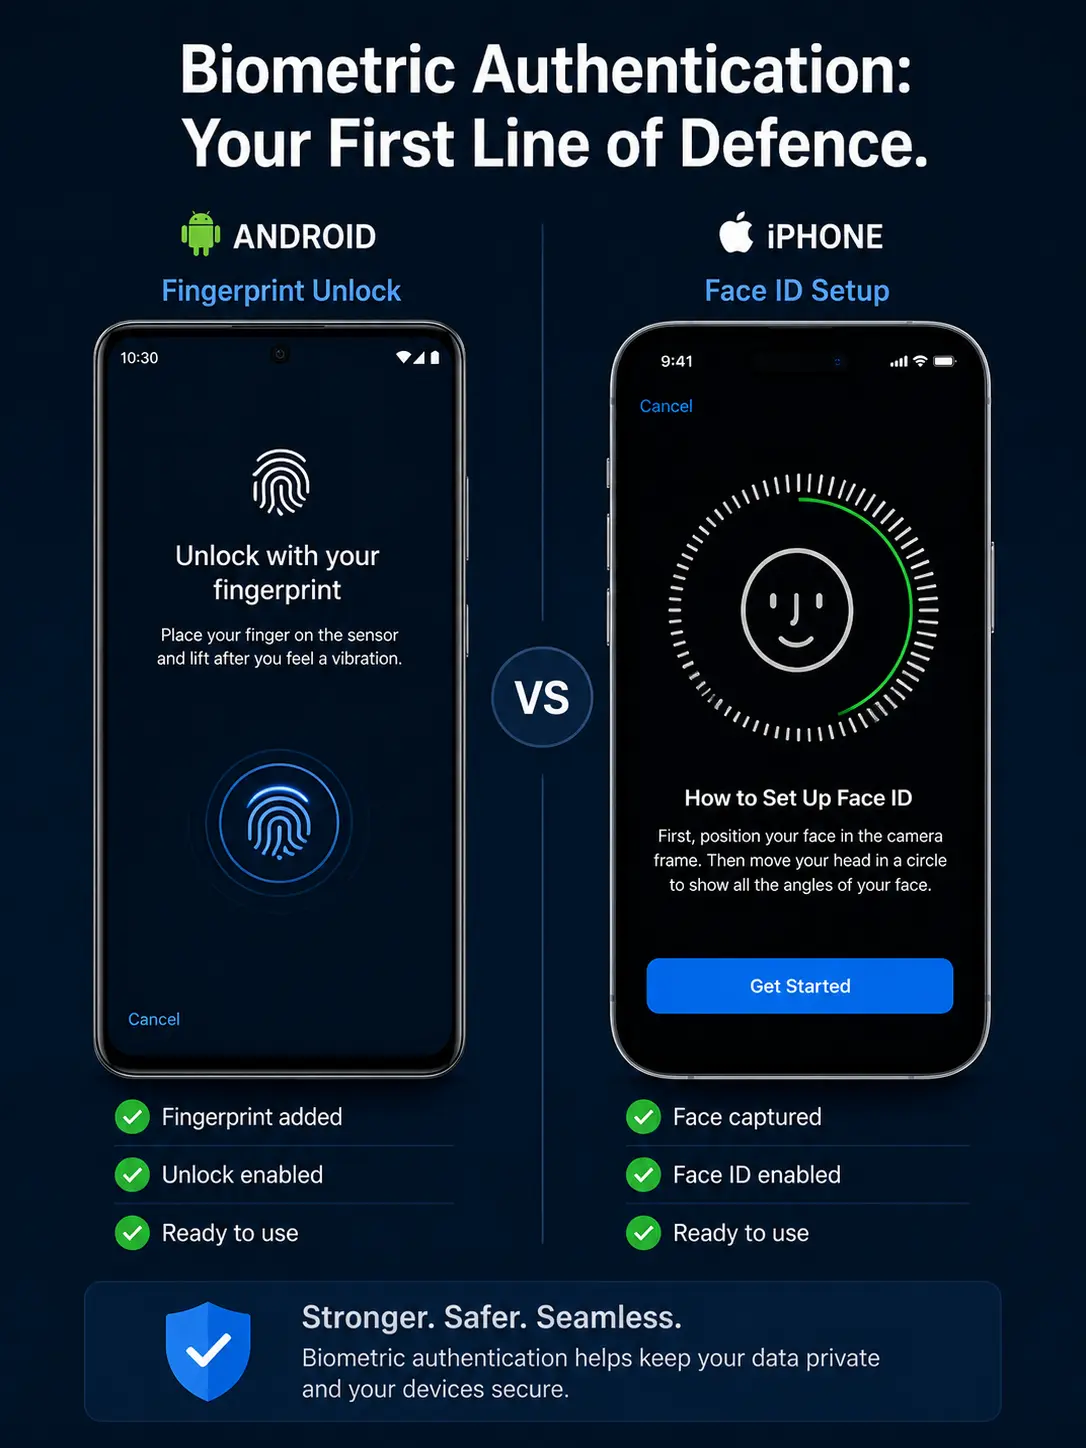
Both Android and iOS support fingerprint and face recognition. Enable at least one biometric method during setup. Biometrics are faster than PINs and meaningfully more secure than patterns. On iPhones, Face ID scans your face using a depth camera system that is difficult to spoof. On most Android phones, an under-display or side-mounted fingerprint sensor provides similar security at a touch.
Also set a PIN as a backup. Use six digits at minimum. Avoid obvious sequences like 123456 or your birth year. Your PIN is the fallback when biometrics fail, so it needs to be something only you know.
Enable Find My Device
Both platforms offer remote device tracking. On iPhone, enable Find My in your Apple ID settings. On Android, enable Find My Device in the Google account settings. These features let you locate, lock, or remotely erase your phone if it is lost or stolen. Activate this before you leave the house with your new device. You can test it at Google’s Find My Device portal or through iCloud.
Lock Down Your Privacy Settings and App Permissions
Modern smartphones ship with settings that collect more data than most users realise. Adjusting them takes five to ten minutes and gives you meaningful control over what apps can access.
Review App Permissions Immediately
Both Android and iOS now include privacy dashboards that show you which apps accessed your location, microphone, camera, or contacts, and when they did it. Go to Settings, then Privacy, to find this dashboard on either platform. Grant permissions on a need-only basis. If a flashlight app asks for your contacts or location, deny it.
Also choose the “only while using the app” setting for location access wherever it appears. This prevents apps from tracking your location while running in the background. It is one of the most effective privacy adjustments on any smartphone.
Disable Your Advertising ID
On Android, go to Settings, then Google, then Ads, and select “Delete advertising ID.” This removes the unique tracking identifier that advertisers use to build a profile of your behaviour across apps. On iPhone, go to Settings, then Privacy and Security, then Tracking, and turn off “Allow Apps to Request to Track.” Both steps reduce the amount of data collected about you without affecting how your apps function.
Control Notifications From the Start
During setup and when installing new apps, be selective about which apps can send notifications. Allowing every app to notify you creates noise that trains you to ignore your phone or feel overwhelmed by it. Grant notification access only to apps where alerts are genuinely useful, such as messaging, calendar, and navigation apps.
Optimise Your Display and Battery Settings
The display is the single biggest battery drain on a modern smartphone. Getting these settings right at the start extends your battery life every day without any extra effort.
Enable Adaptive Brightness
Adaptive brightness, also called auto-brightness, adjusts your screen brightness based on the ambient light around you. It uses your phone’s light sensor to avoid running the screen brighter than needed. Enable it in your display settings. Set a screen timeout between 30 seconds and one minute so the display switches off quickly when you put the phone down.
Turn On Dark Mode
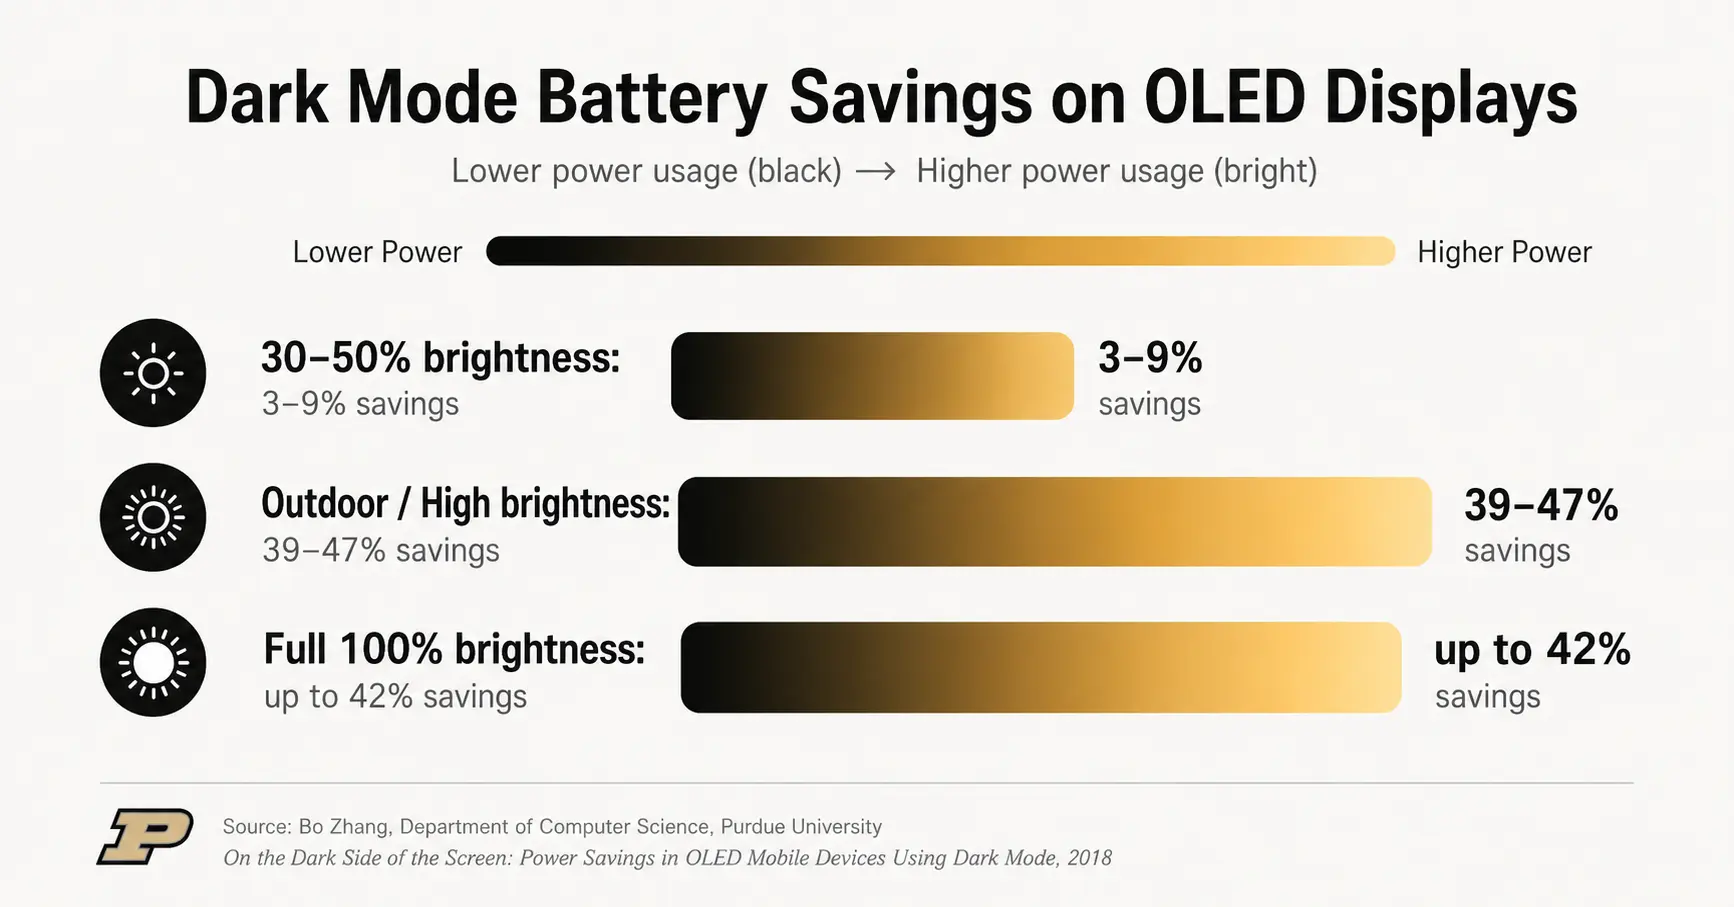
If your phone has an OLED display, and most flagships and midrange devices now do, dark mode saves measurable battery power. Research from Purdue University found that dark mode at 100 percent screen brightness saves between 39 and 47 percent of display power, as detailed in Purdue University’s official research findings. At average indoor brightness levels, savings are smaller but still consistent.
OLED displays work differently from older LCD screens. Each pixel produces its own light. Black pixels are essentially switched off, which means dark-themed interfaces draw less power than white ones. Dark mode is not just an aesthetic choice on an OLED phone. It is a practical battery management tool.
Set Up Battery Saver Mode
Both iOS and Android include a battery saver mode that automatically reduces background activity when your charge drops below a set threshold. Configure it to activate at 20 percent battery. This buys you extra time before needing a charger without you having to remember to switch it on manually.
Install and Organise Your Apps the Right Way
Reinstalling apps on a new phone is tempting to rush. Take a slower approach and you end up with a cleaner, faster device.
Only Install What You Actually Need
Rather than restoring every app from your old phone, start with the ones you use daily. Add others over the following week as you need them. This approach naturally filters out the apps you downloaded once and never opened again. Fewer apps means fewer background processes, fewer notifications, and a faster phone.
Organise Your Home Screen for Productivity
Place the apps you use most often on your home screen within easy thumb reach. Group similar apps into folders to reduce clutter. Keep your first page to eight to ten apps maximum. A clean home screen reduces the time you spend hunting for things and helps you stay focused when you pick up your phone.
Update All Apps Immediately After Installing
App stores often include older versions of apps in backup transfers. After restoring or reinstalling, open the App Store or Google Play and run a full update on everything. Updates patch security vulnerabilities and fix bugs that may have been present in the version you installed. This step takes a few minutes but is worth doing right away.
Back Up Your New Phone Before You Do Anything Else
Many people wait weeks before setting up a backup system on a new phone. By then, they have photos, messages, and app data they cannot afford to lose. Set up cloud backup on day one.
Enable Cloud Backup on iPhone and Android
On iPhone, go to Settings, then your Apple ID, then iCloud, and enable iCloud Backup. Set it to back up daily over Wi-Fi. On Android, go to Settings, then Google, then Backup, and enable Back Up to Google Drive. Both services back up your contacts, photos, app data, and device settings automatically while your phone charges overnight.
A backup system that runs automatically is the only kind that actually works. Manual backups get forgotten. Overnight cloud backups do not.
Consider a Secondary Photo Backup
For photos specifically, consider using Google Photos on both platforms. It offers free compressed storage or paid original-quality storage. Having a second copy of your photos in a separate service from your main backup adds a practical layer of protection against data loss.
Explore the AI Features Built Into Your Device
Smartphones released in 2025 and 2026 come with AI tools built directly into the operating system. These are not gimmicks. They handle tasks that previously required third-party apps or significant manual effort.
Samsung Galaxy AI includes Circle to Search, which lets you circle anything on your screen to instantly search for it. It also includes Chat Assist for tone adjustment in messaging, and Note Assist for AI-powered summarisation. On Google Pixel devices, the Call Screen feature filters spam calls automatically, while the Recorder app transcribes conversations in real time. Apple Intelligence on recent iPhones handles writing suggestions, photo cleanup, notification summaries, and contextual Siri requests.
Spend 15 minutes exploring the AI features specific to your device after the core setup is complete. Many of these tools are switched off by default and need to be enabled in settings to become useful.
Frequently Asked Questions
How long does a full new smartphone setup take?
A complete setup, covering SIM installation, account login, data transfer, security settings, and app installation, typically takes 45 minutes to 90 minutes. Data transfer time varies depending on how much content you are moving. Large photo libraries and extensive app collections extend the process.
Do I need to charge my new phone to 100% before using it for the first time?
Modern lithium-ion batteries do not require a full charge before first use. This advice carried over from older battery technology and no longer applies. Use your phone normally from the start. Keeping your battery between 20 and 80 percent charge over time does extend long-term battery health, but an initial full charge is not necessary.
What is the safest way to transfer data from an old phone to a new one?
For same-platform transfers, use the built-in transfer tool provided by Apple or Google. Both use encrypted connections to move your data directly between devices. Avoid third-party transfer apps from unverified developers, as they may request unnecessary permissions or store copies of your data on external servers.
Should I set up an eSIM or use a physical SIM card?
eSIM offers several practical advantages: faster carrier switching, no risk of a physical card getting damaged or lost, and support for multiple numbers on one device. If your phone supports eSIM and your carrier offers it, eSIM is generally the better choice. Physical SIM is still useful if you frequently travel internationally and swap local SIM cards.
How do I know which app permissions to allow?
Grant permissions based on whether the permission makes logical sense for the app’s function. A navigation app needs your location. A camera app needs your camera and storage. A recipe app needs neither. If an app requests permissions that do not match what it does, deny them. Use your phone’s privacy dashboard to review and revoke permissions at any time after installation.
How often should I back up my new phone?
Daily automatic cloud backups are the standard recommendation. Enable overnight backups over Wi-Fi so the process runs while your phone charges and does not consume your mobile data. If you store a high volume of important files or photos, consider a secondary backup to a separate service for extra redundancy.
Get Your New Smartphone Setup Right the First Time
Taking the time to set up a new smartphone properly pays dividends for as long as you own the device. Strong authentication protects your accounts. Carefully chosen permissions protect your privacy. A solid backup system protects your data. Display and battery optimisation protect your daily experience. Each step builds on the last, and the whole process takes less time than most people expect.
The key takeaway is this: a five-minute shortcut during setup often costs hours of troubleshooting later. Walking through the steps in this guide once, in order, gives you a device that is secure, organised, and configured to your actual preferences rather than factory defaults.
As smartphone AI features mature and new security challenges emerge, revisiting your settings every few months is a good habit. Check your app permissions after major operating system updates. Run a backup test every quarter to confirm your data is genuinely being saved. Stay informed by reading coverage from trusted sources like The Verge’s smartphones section when platform updates change how settings work.
Your new phone is ready. Set it up the right way once, and it will work better for you every single day that follows.

Prince Anichi
Founder and Lead Technology Editor at Ortechy. Covering digital economy shifts, tech ecosystems across Africa, cybersecurity intelligence, and emerging software platforms.